
People often say that Facebook is an excellent platform for making your first sale, but getting started can be a mystery. Here’s a guide to help you achieve your first sale using Facebook Ads! Getting your first sale can be tough, but I understand the struggle. Imagine if you could connect with people who are a perfect match for your product and are already buying similar items. That’s where Facebook Ads come in! Let’s see A Beginner’s Guide to Making Your First Sale with Facebook Ads.
Facebook has extensive data on people’s preferences, purchases, travel habits, and more. With Facebook Ads, entrepreneurs and online store owners can showcase their products to the right audience.
For example, if your online store sells “playing cards for teenagers,” Facebook Ads can target teenagers interested in playing cards from specific areas, cities, or states.
Many eCommerce businesses, especially new ones, use Facebook advertising to boost their sales. It’s an affordable and straightforward way to attract new customers.
Even if you’re new to running ads, you can achieve great results without spending a lot of money, as long as you’re willing to learn.
In this article, we’ll explore how to create effective Facebook ads for your products, track their performance, and increase sales for your online store—all without breaking the bank.
Why use Facebook for advertising?
Facebook is the leading platform for online marketing, particularly favored by local businesses, with 62% of them utilizing it—and for good reason.
Three key factors make Facebook appealing to both new and established businesses:
1. Attracts Real Customers to Your Online Store
Facebook is a global hub where people connect with friends, brands, and discover new products.
With over 3 billion users and 1.55 billion monthly active users, Facebook sees an average user spending 40 minutes per day on the platform.
Facebook’s extensive user data and higher ad conversion rates compared to other platforms make it an ideal place to advertise and drive traffic to your eCommerce store.
2. Target Customers Based on Demographics, Interests, and Behavior
Facebook’s extensive user data allows you to precisely target individuals who are most likely to become your customers.
For example, you can target working women aged 30-35 who earn a salary and have previously purchased apparel online. This level of targeting ensures your ads reach the right audience, increasing the likelihood of conversions.


Facebook enables you to display ads to users based on various criteria such as age, gender, location, marital status, job title, and interests. Additionally, you can target behaviors, including recent purchases, relocations, or recent marriages.
This precise targeting can significantly improve the effectiveness of your ads.
3. Ads Are Easy to Set Up
Facebook simplifies the ad creation process by guiding you through selecting the ad type, defining your target audience, setting your budget, and choosing the ad duration.
Monitoring ad performance is crucial, and Facebook’s analytics tools make it easy to track how well your ads are meeting your goals. Once you’re satisfied with the results, you can increase your budget to achieve even better outcomes.
Now, let’s dive into the step-by-step process of creating your first Facebook ad.

Step 1: Set Up Your Facebook Business Manager
To begin with Facebook ads, you need to set up a Business Manager account.
Business Manager serves as a central hub for managing your Facebook ad account, business pages, and other essential tools for running ads.
Visit business.facebook.com and click on “Create Account” to get started.
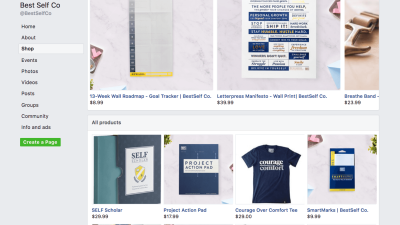
After clicking “Create Account,” Facebook will prompt you to enter your business name, Facebook business page, your name, and email address. If you don’t have a business page yet, you’ll need to create one to use Facebook ads.
Next, you’ll need to create a new ad account or add an existing one. To do this, navigate to Business Settings in the Business Manager menu, click on Accounts, and then select Ad Accounts.
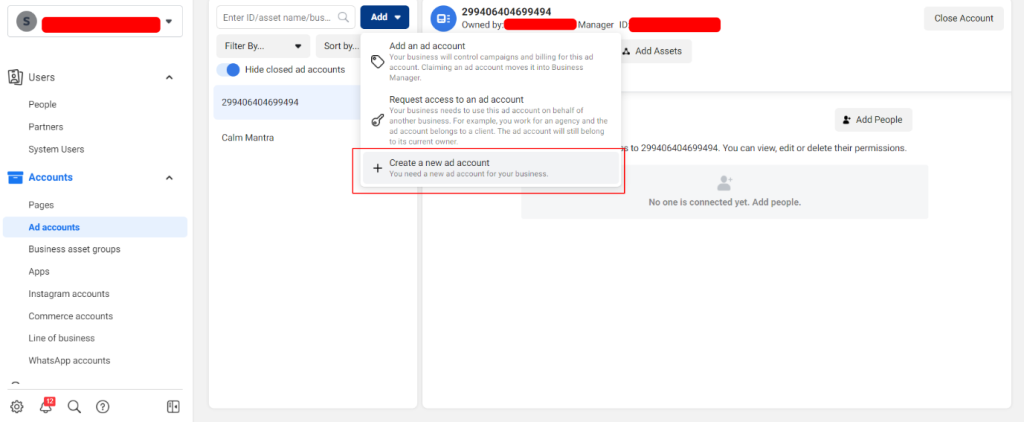
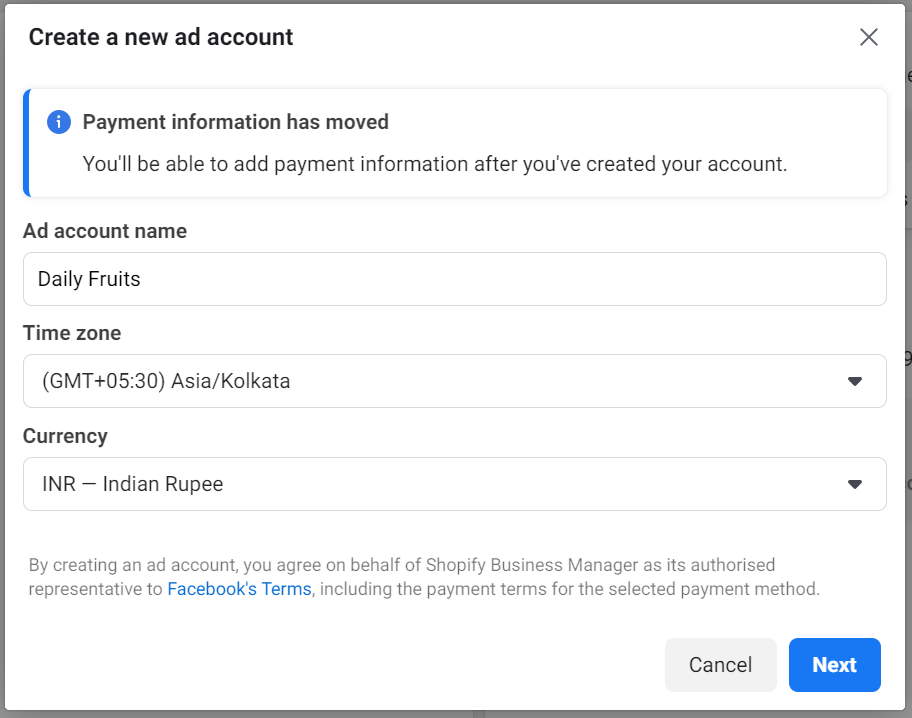
Create a New Ad Account. You’ll then be prompted to provide details to set up your ad account. Enter a name for your ad account—this can be anything you choose. Select the Indian Time Zone and Currency as shown in the image below.
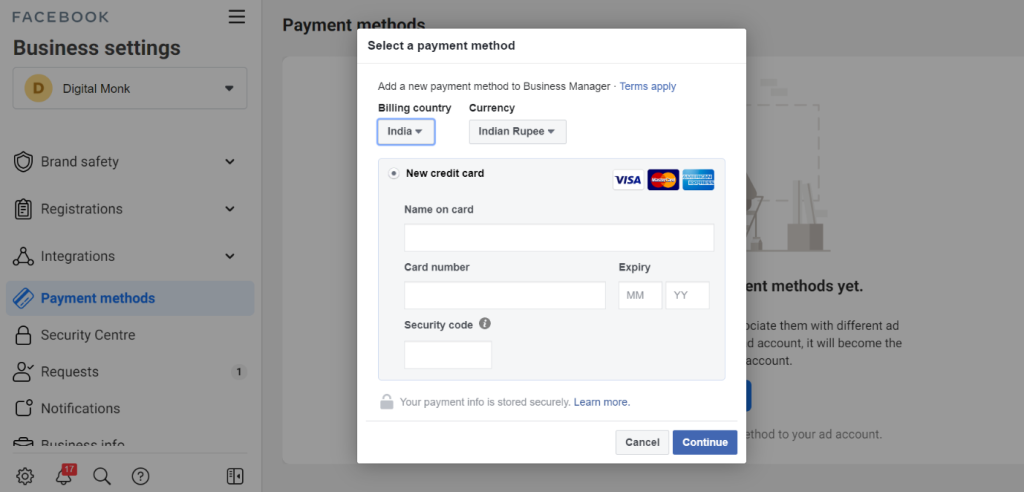
Next, you’ll need to add a new payment method. Go to Settings, select Payment Methods from the left-hand menu, and click on Add Payment Method. Enter your credit card details to proceed.
After setting up Business Manager and linking it to your Facebook business page and ad account, your Business Manager dashboard will look like this:
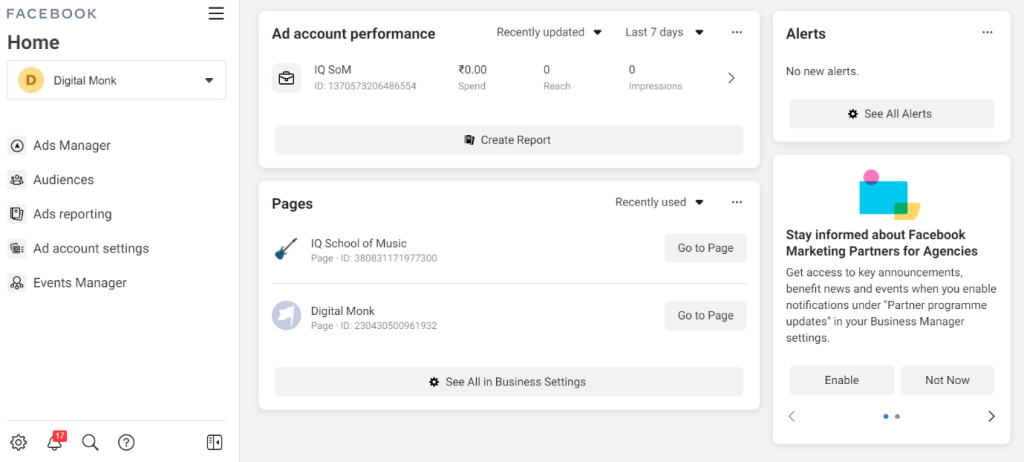
This is your advertising hub, where you can create, run, and manage all your Facebook ads.
Step 2: Install Facebook pixel
What is the Facebook Pixel? The Facebook Pixel is an analytics tool that helps you measure the effectiveness of your advertising by tracking the actions people take on your website.
To track the performance of your ads, you need to install the Facebook Pixel on your store.
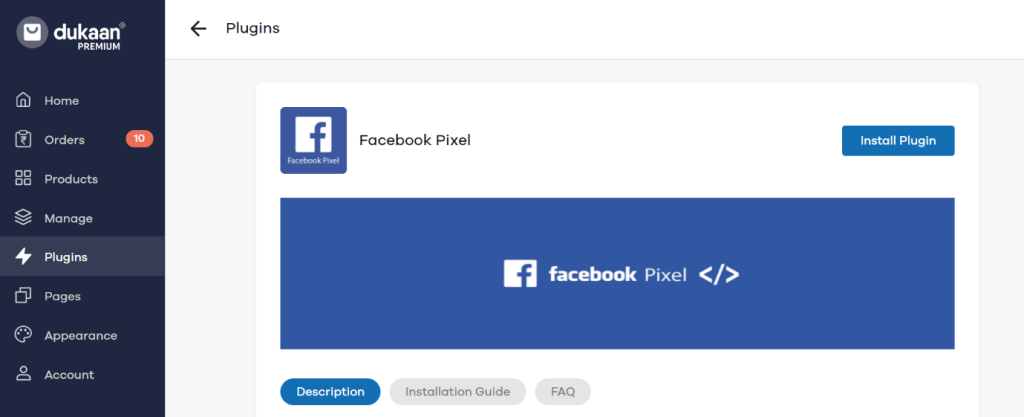
The Facebook Pixel is a tracking code that monitors events on your store. You can create this code within your Business Manager account and then add it to your website using a simple plugin if you’re using Grocito.
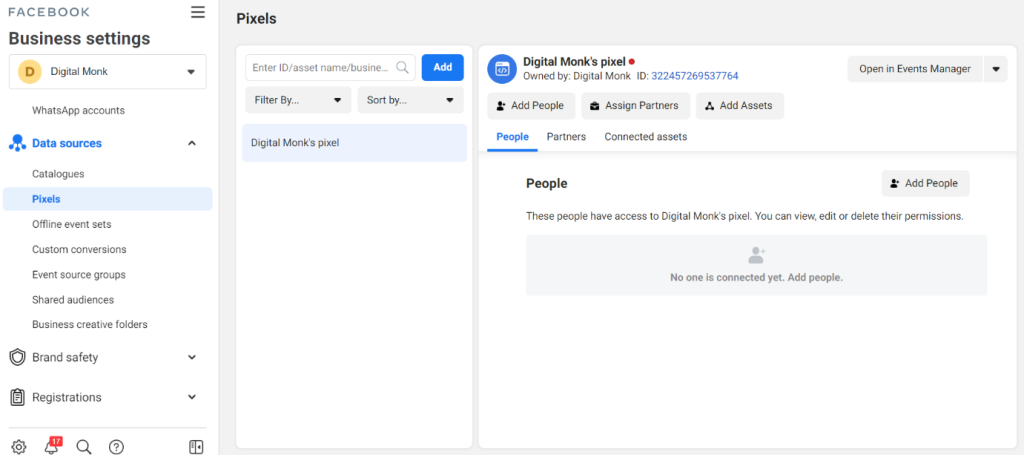
To create a Pixel for your account, navigate to Business Settings. Then, go to Data Sources and select Pixels.
Click on Add, and then click Continue to complete the process. Once you’ve added the Pixel, you’ll see a screen like the one below. The ID on the right side is your Pixel ID, which is a 16-digit number.
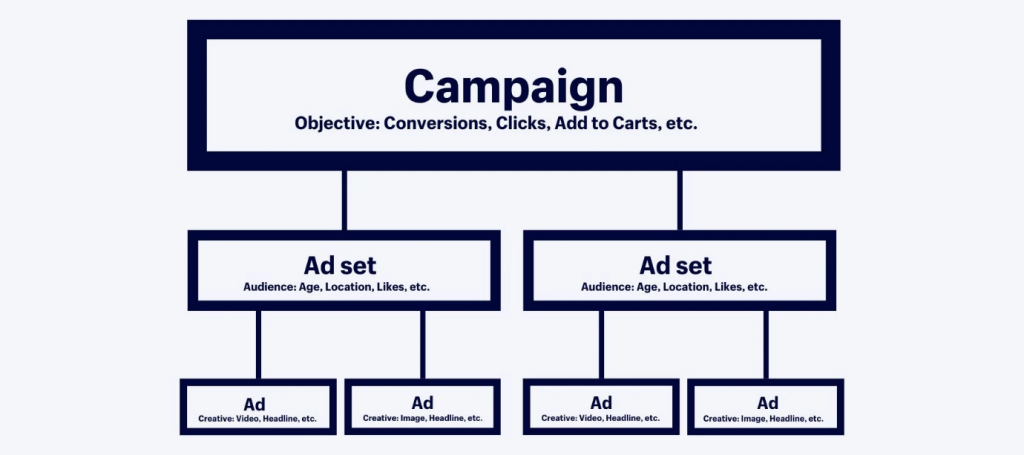
Step 3: Create Your First Facebook Campaign
Similar to other advertising platforms, Facebook uses a structured approach to create ads.
This structure consists of three parts: campaign, ad set, and ads.
Each campaign can contain one or more ad sets, and each ad set can include multiple ads, allowing you to test and determine which ones perform best.
The structure is as follows:
Choose an objective for your campaign
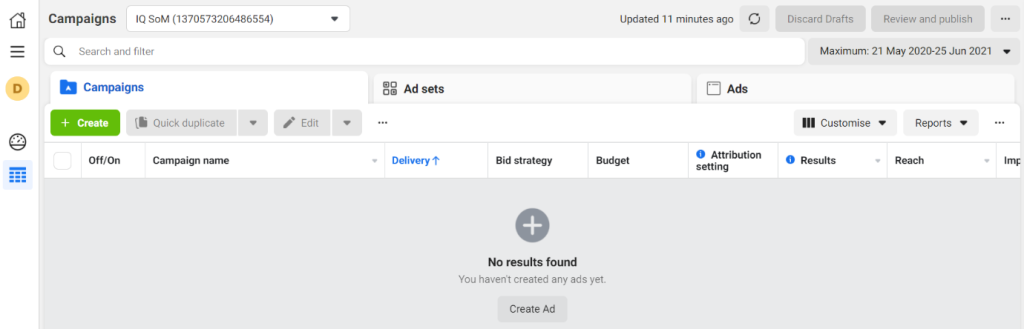
To create your first campaign, navigate to Ads Manager and click the Create button.
Next, you’ll need to select your campaign objective. Facebook ads offer three main objectives: awareness, consideration, and conversion.
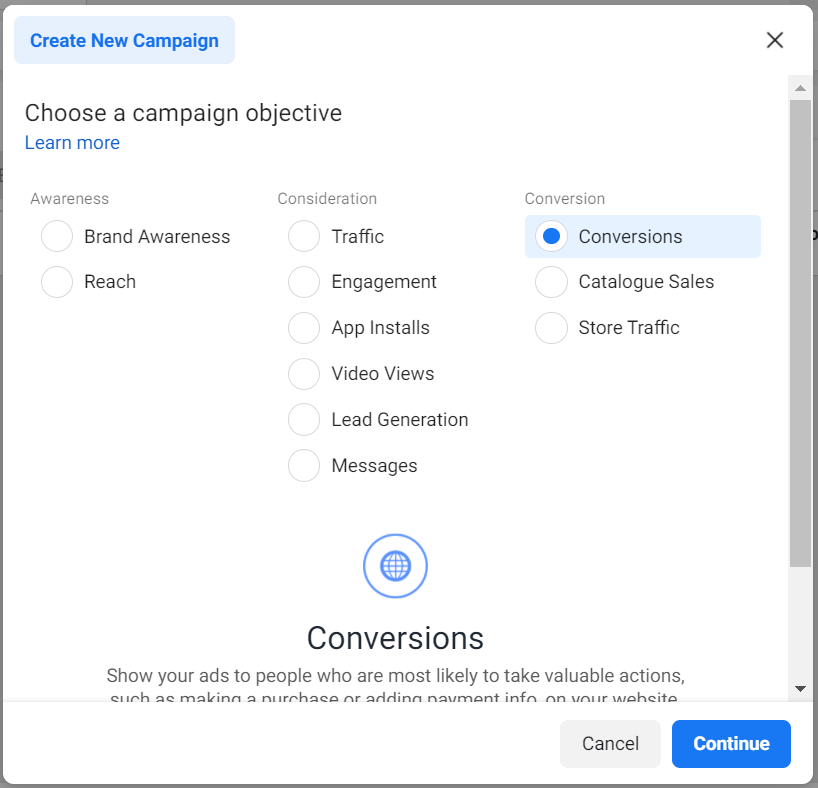
Under each category, you can choose from various campaign types such as traffic, conversions (for sales), lead generation, and more. Since our goal is to generate sales, we’ll select Conversions under the Conversion category.
Next, name your campaign based on its objective. For instance, if it’s a conversion campaign for t-shirts, you might name it “Conversion T-shirt.”
Click Continue to start setting up your first campaign.
Step 4: Set up your Ad Sets
After clicking Continue, the next step is to set up your campaign at the ad set level, where you can choose:
- The audience you wish to target
- The budget for the campaign
- The placements where you want your ads to appear (e.g., Facebook Feed, Groups, Stories, etc.)
Start by naming your ad set.
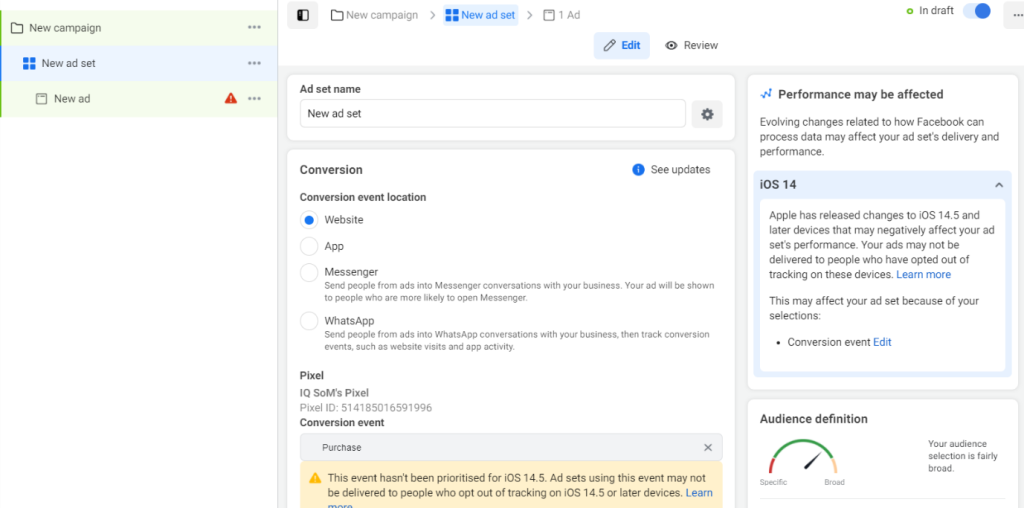
Set the Conversion event location to Website only.
For the conversion event, select Purchase. By choosing Purchase, you are indicating to Facebook that the goal of this campaign is to generate sales. Facebook will then show your ads to people who are more likely to make a purchase from your website.
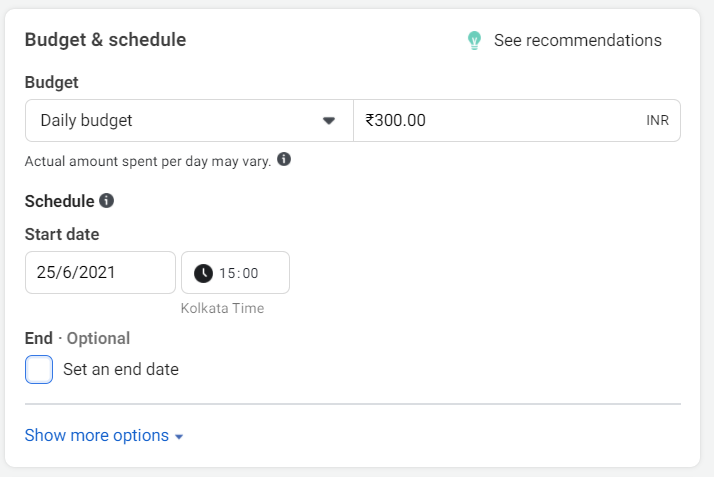
Set Your Budget and Schedule
Next, you’ll need to enter your budget within the ad set and choose the budget type.
There are two types of budgets: daily budget and lifetime budget.
A daily budget is the amount you will spend each day. For example, if you set a daily budget of Rs. 500, Facebook will spend Rs. 500 each day to find customers.
A lifetime budget requires you to set a start date and an end date, and Facebook will distribute the total budget over this period.
Tip: It’s advisable to start with a low daily budget. Set an amount that fits your needs and gradually increase it as you see results.
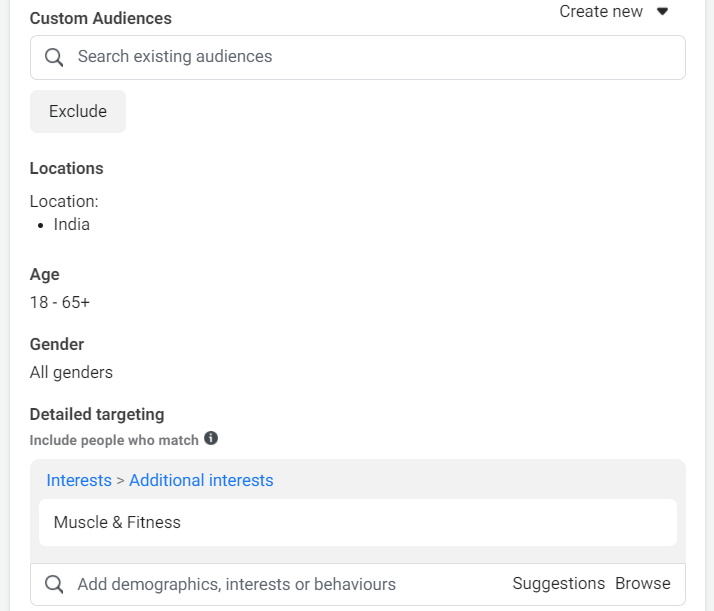
Choose Your Audience
Within ad sets, you can define who will see your ads. Select the age, gender, and location that closely match your target audience. For example, you might choose India as the location.
You can also target people based on their interests and behaviors by using the Detailed Targeting option.
Search for and select interests or behaviors that align with your customers. This way, Facebook will show your ads to people who resemble your target audience and are more likely to make a purchase.
For instance, if you are selling sportswear, your ideal customer might be someone interested in fitness and gyms. You can add “Fitness” and “Gyms” in the detailed targeting section to reach these individuals.
Placements
Facebook allows you to choose where your ads will appear. Your ads can be shown on Facebook, Instagram, Messenger, and other partner websites.
There are two placement options: manual and automatic.
If you select automatic placements, Facebook will display your ads across all the platforms mentioned above. However, if you prefer to show your ads on specific platforms, you can choose Manual placements and select your preferred options.
For example, if you want your ads to appear only on Instagram, select Manual placements and choose Instagram from the options.
Once you’ve made your selection, click the Next button to continue.
Tip: If you’re unsure where to display your ad, choose Automatic placements. Facebook will optimize ad placement to maximize your sales.
Step 5: Choose your design for the ad
Format and Design
The format and design of your ads are crucial for effective Facebook advertising. You can create various types of ads, such as single images, videos, or multiple images (Carousel).
Start by naming your ad in the Ad Name field. Then, choose the format: single image, video, or Carousel if you want to use multiple images.
Next, select the media for your ads: images, slideshow, or video. We recommend starting with images for your ads.
The recommended image size is 1200 x 628 pixels, and it’s best to save images in .png format.
Tip: If you want to showcase multiple products, consider using carousel ads.
Text
Text is a crucial element of your ad design. Here, you can add the primary text, headline, and description for your ad.
- Primary Text: Describe the benefits of your product and highlight the value it brings to potential customers.
- Headline: Keep it short and focus on the main characteristics of your product. If the price is a key selling point, mention it to emphasize affordability.
- Description: This is optional and will be shown by Facebook based on its relevance to the viewer.
Next, choose a call-to-action (CTA) button. The CTA encourages users to take action and should reflect your desired outcome. For example, if you want users to purchase from your website, select the “Shop Now” button.
Tip: Ensure your text stays within the character limit to avoid truncation.
Destination and Tracking
This option lets you direct people to your website. Since we’re aiming to drive traffic to an online store in this example, select “Website.”
The final option is Tracking. Simply click on Website Events to monitor user actions on your site. For instance, you’ll be notified when someone views a product page or adds an item to their cart.
After you’re satisfied with everything, review your campaign settings one last time, then click Confirm to launch your campaign.
Step 6: Optimize Your Facebook Campaigns
Creating an ad for your business on Facebook is just the beginning. To achieve your business goals, you need to monitor its performance and make necessary adjustments.
To be successful and see results, it’s crucial to check your Facebook ads’ performance at least once a day. If you’ve increased your spending, you might want to check more frequently.
Remember to be patient with your Facebook ads. It can be tempting to tweak settings or turn off an ad if you don’t see immediate purchases, but it’s important to give it some time.
Tip: Avoid changing your ads daily. Instead, track performance once you’ve built enough volume, such as on a weekly or monthly basis.
Facebook ads need time to optimize as the algorithm learns which audience is most relevant. If you’re unsure about your ads’ performance and whether to keep them active, wait until they receive at least 1,000 impressions before deciding to invest more or stop them entirely.
Tools to Help You Set Up and Run Facebook Ads
Execution is key, right? Here are some “secret” tools to help you run Facebook Ads effectively:
- Qwaya: Ideal for beginners, offering tools for both Facebook and Instagram.
- Adspresso: Perfect for advanced users focused on advertising and lead generation.
- Hootsuite Ads: Great for those on a tight budget, excellent for ad optimization.
- Canva: Assists in creating eye-catching Facebook ad creatives.
Conclusion
Congratulations! You’ve successfully set up your first Facebook Ad. Now that you’re familiar with the basics of Facebook advertising, you’re ready to launch your first campaign to promote your products.
Start slowly, create your ads, monitor their performance, and gradually scale your online store.
Follow these steps to create your first successful Facebook ad campaign.
Good luck!